ENS Domain Registration
How to Register Gem Wallet to an ENS Domain
Learn how to connect and register Gem Wallet to an ENS Domain in just 3 easy steps.
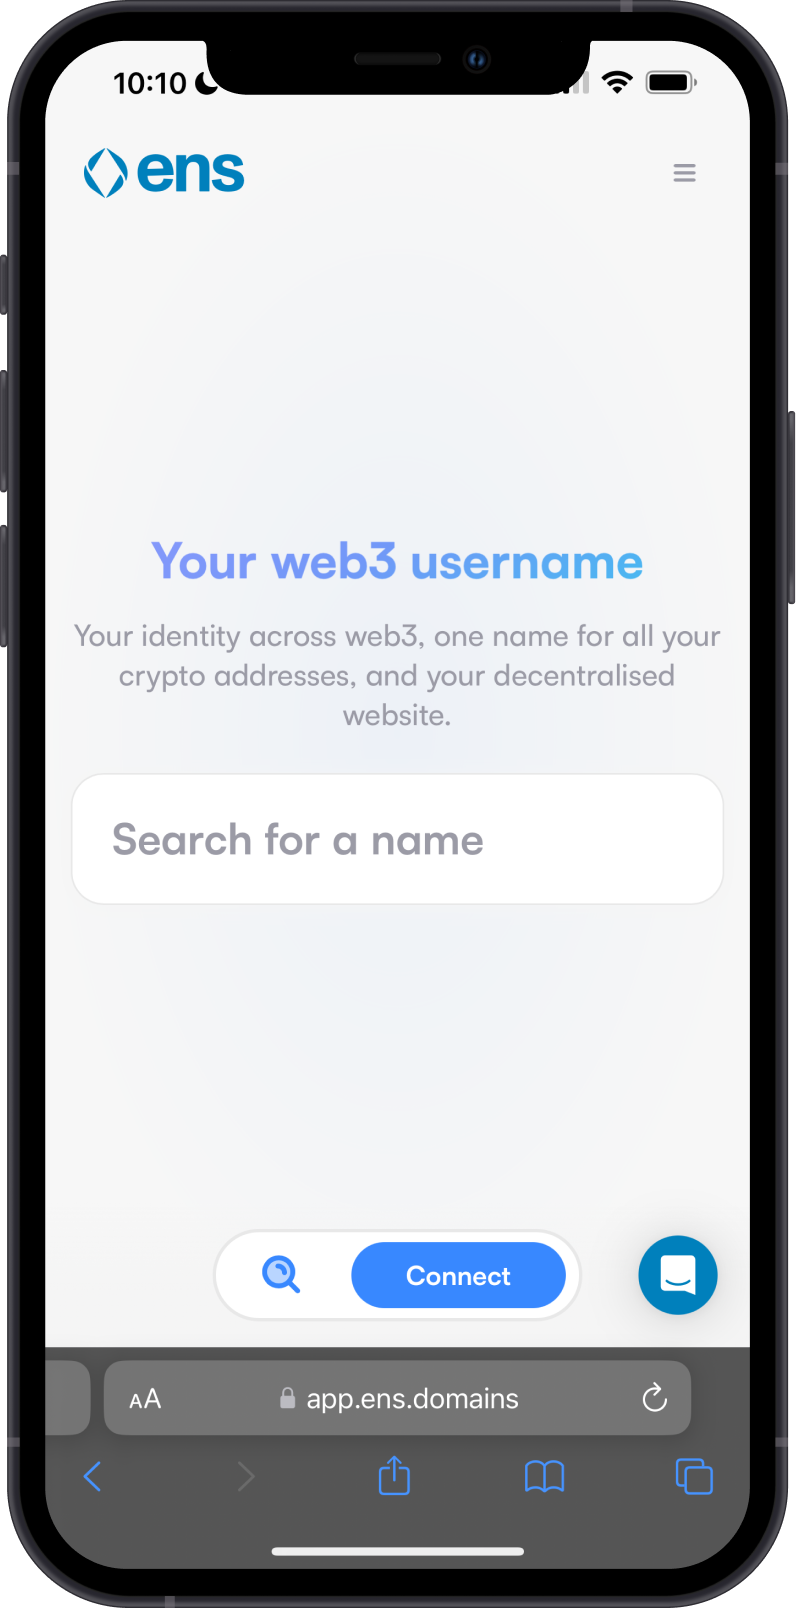
In this guide, we will register a wallet address to ENS Domains. With ENS Domains, you will get a personalized .eth name of your choosing. You need to have some Ethereum on your wallet to purchase an ENS Domain name.
Step 1 - Connect Wallet to Name Service Site
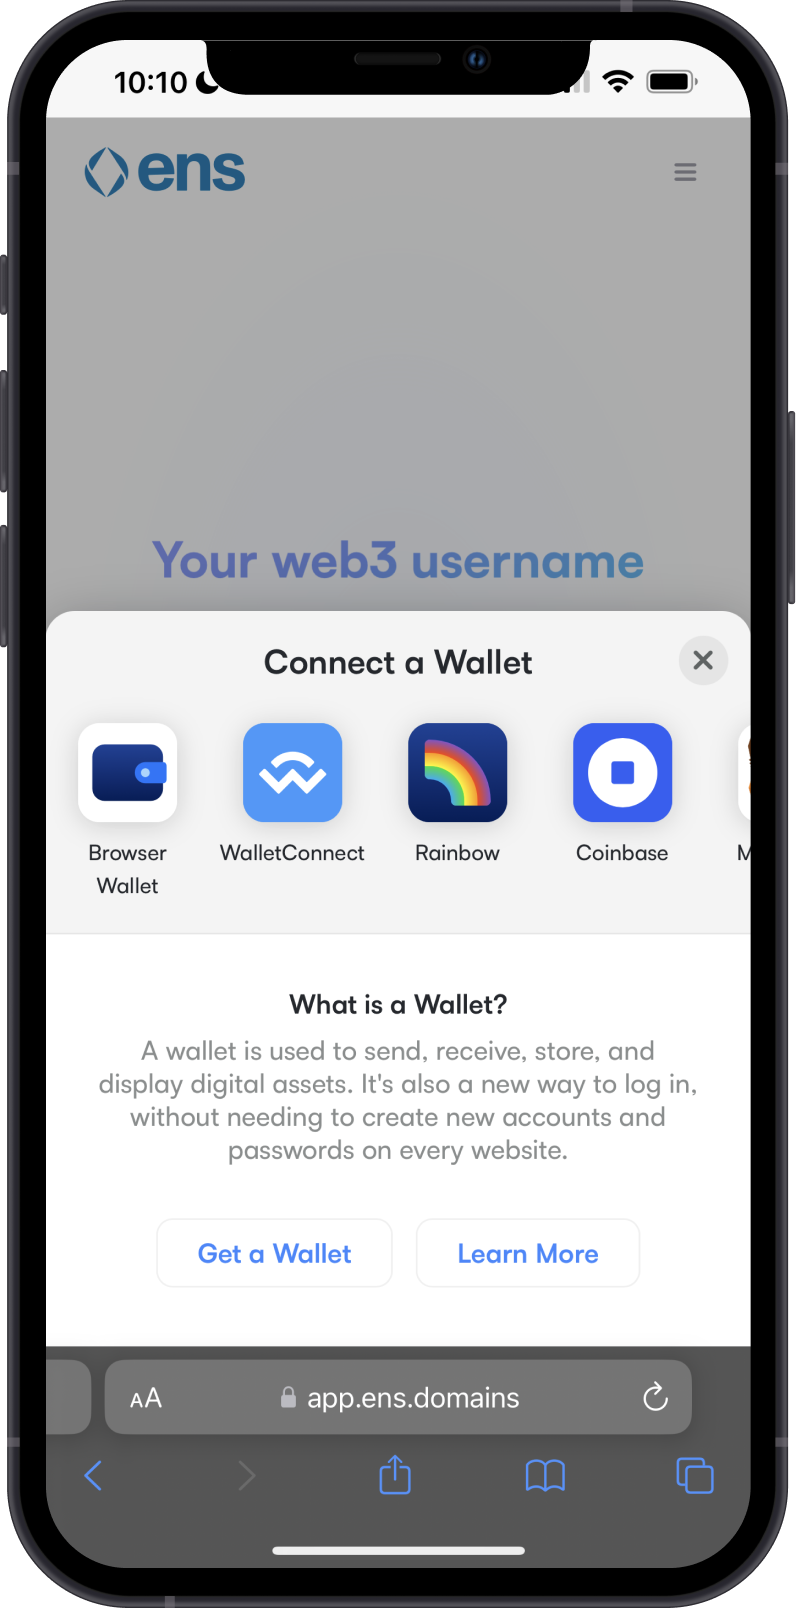
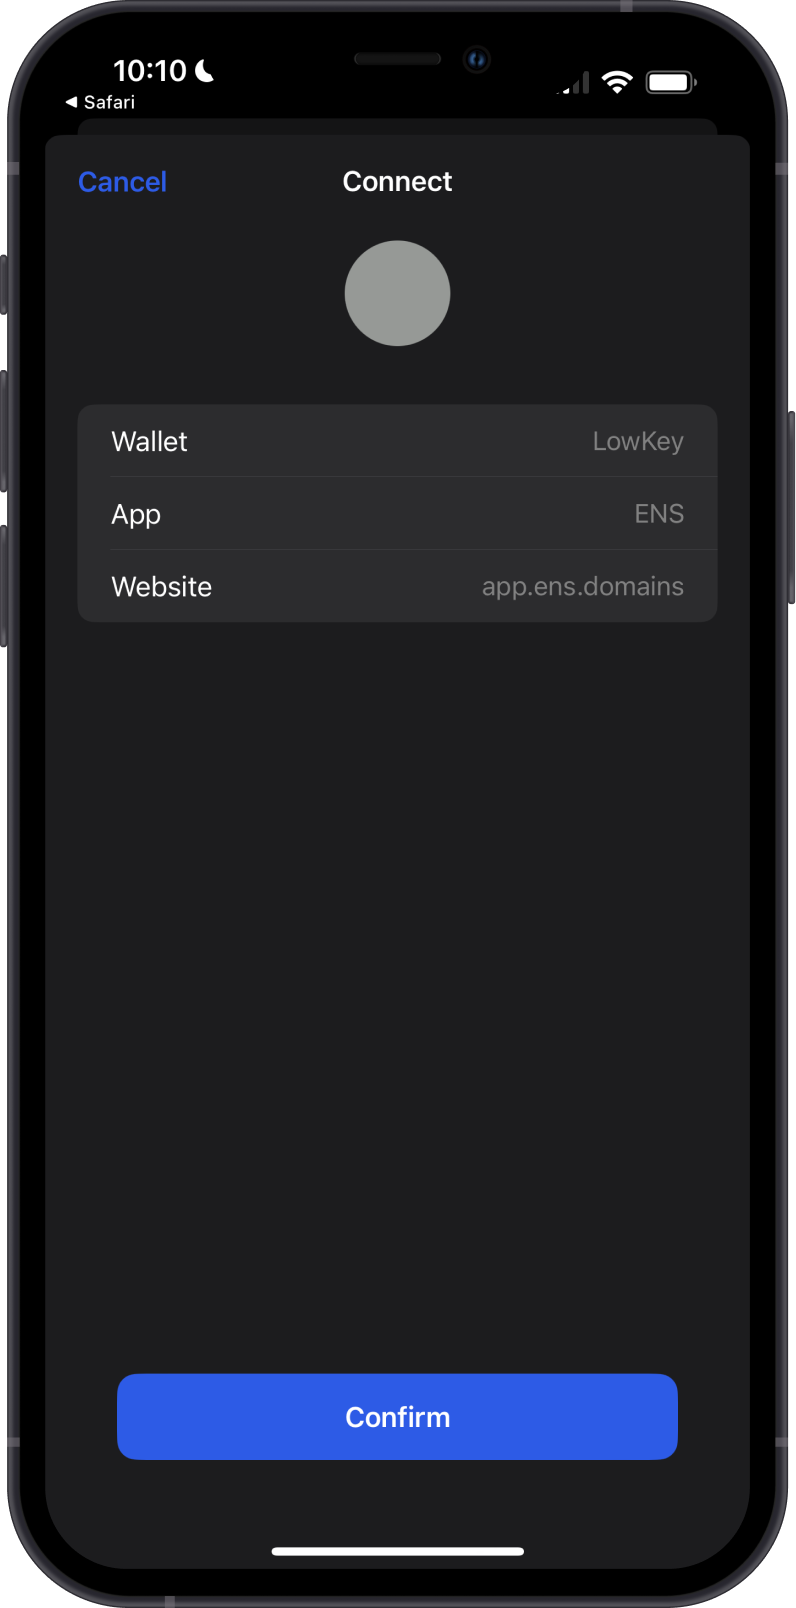
Using WalletConnect, you can connect Gem Wallet to the ENS Domains website. Tap on Connect to see the available options. Tap on WalletConnect.
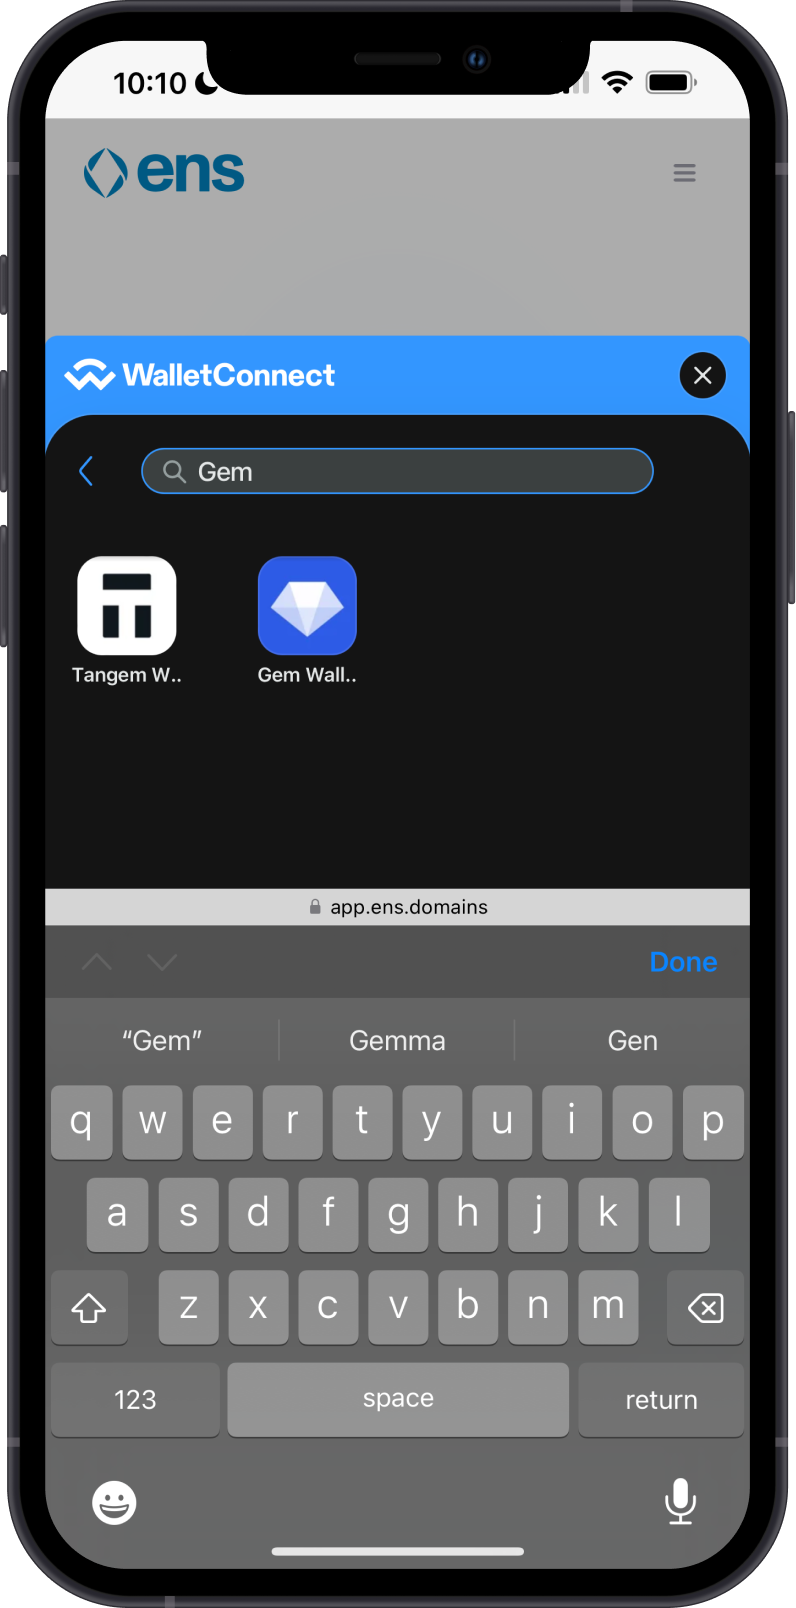
Search for Gem Wallet, then tap on it. You will be prompted to Open the application. Tap on Open.
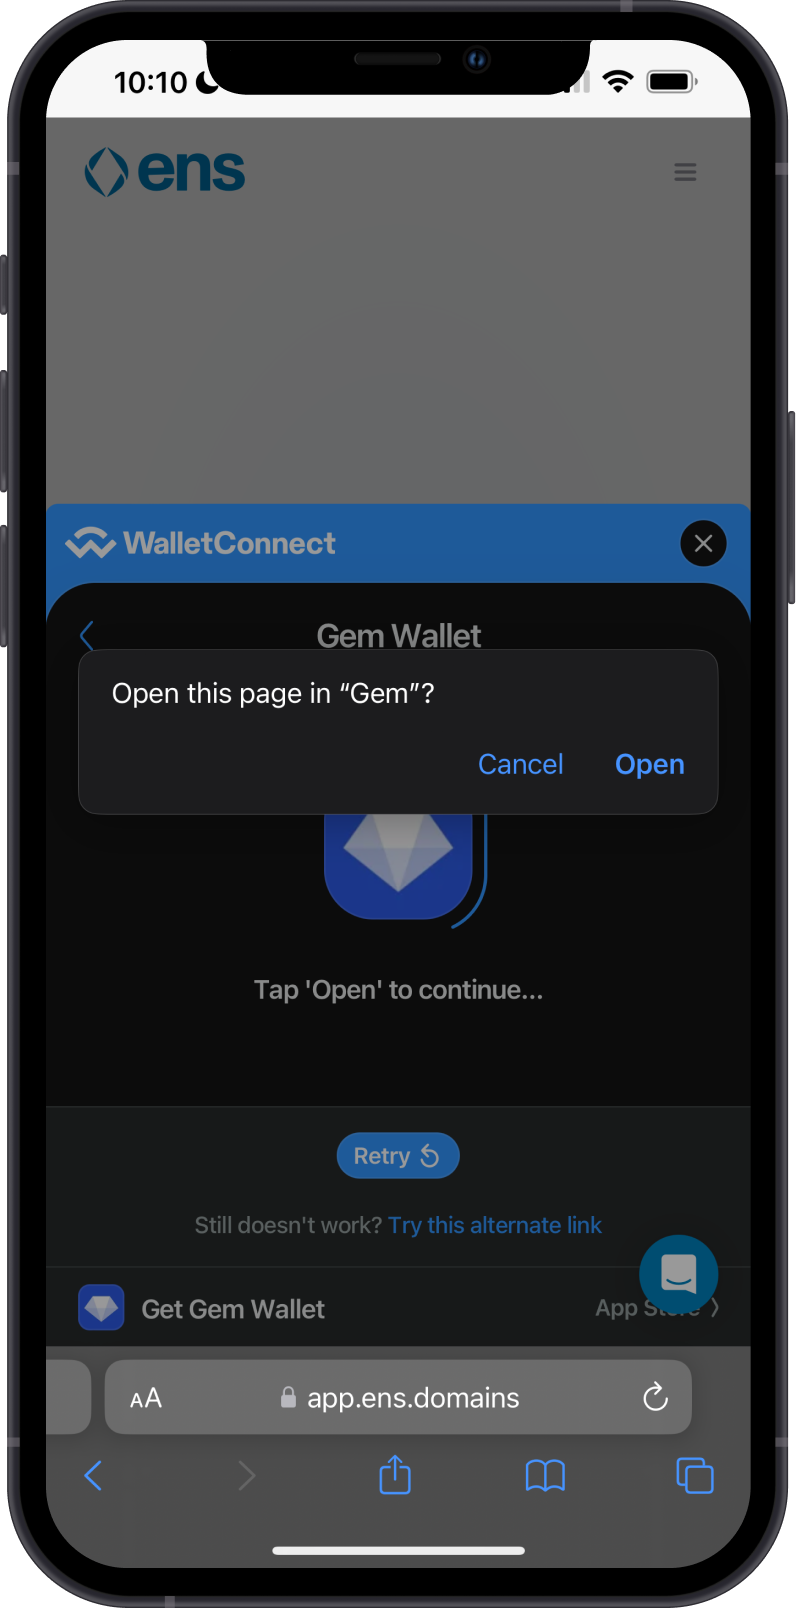
The WalletConnect protocol that is integrated on Gem Wallet will automatically detect the connection request. Tap on Confirm. You are now ready to search for a name.
See WalletConnect Guide for additional information.
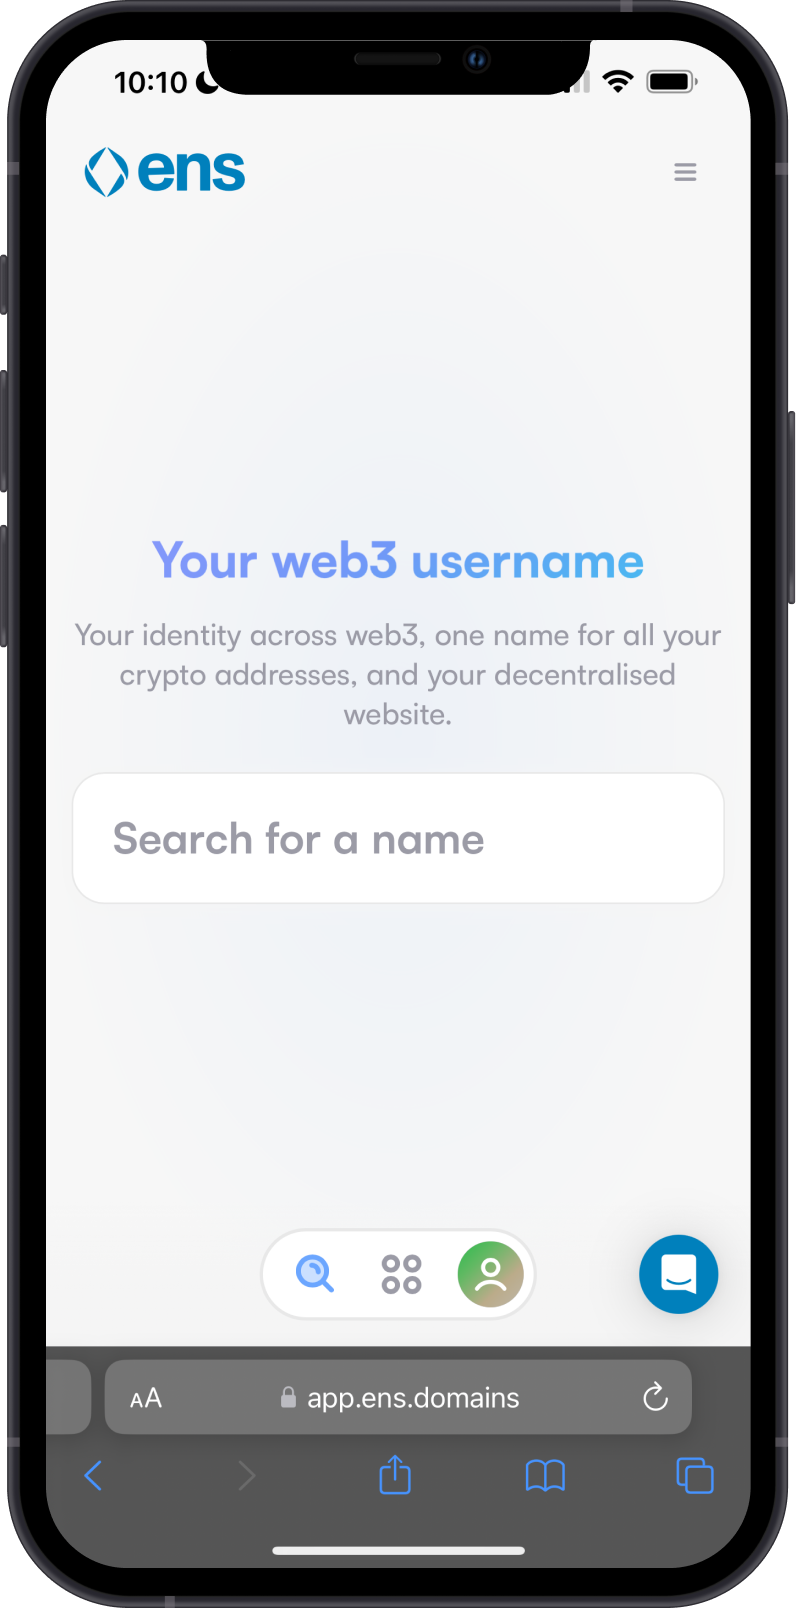
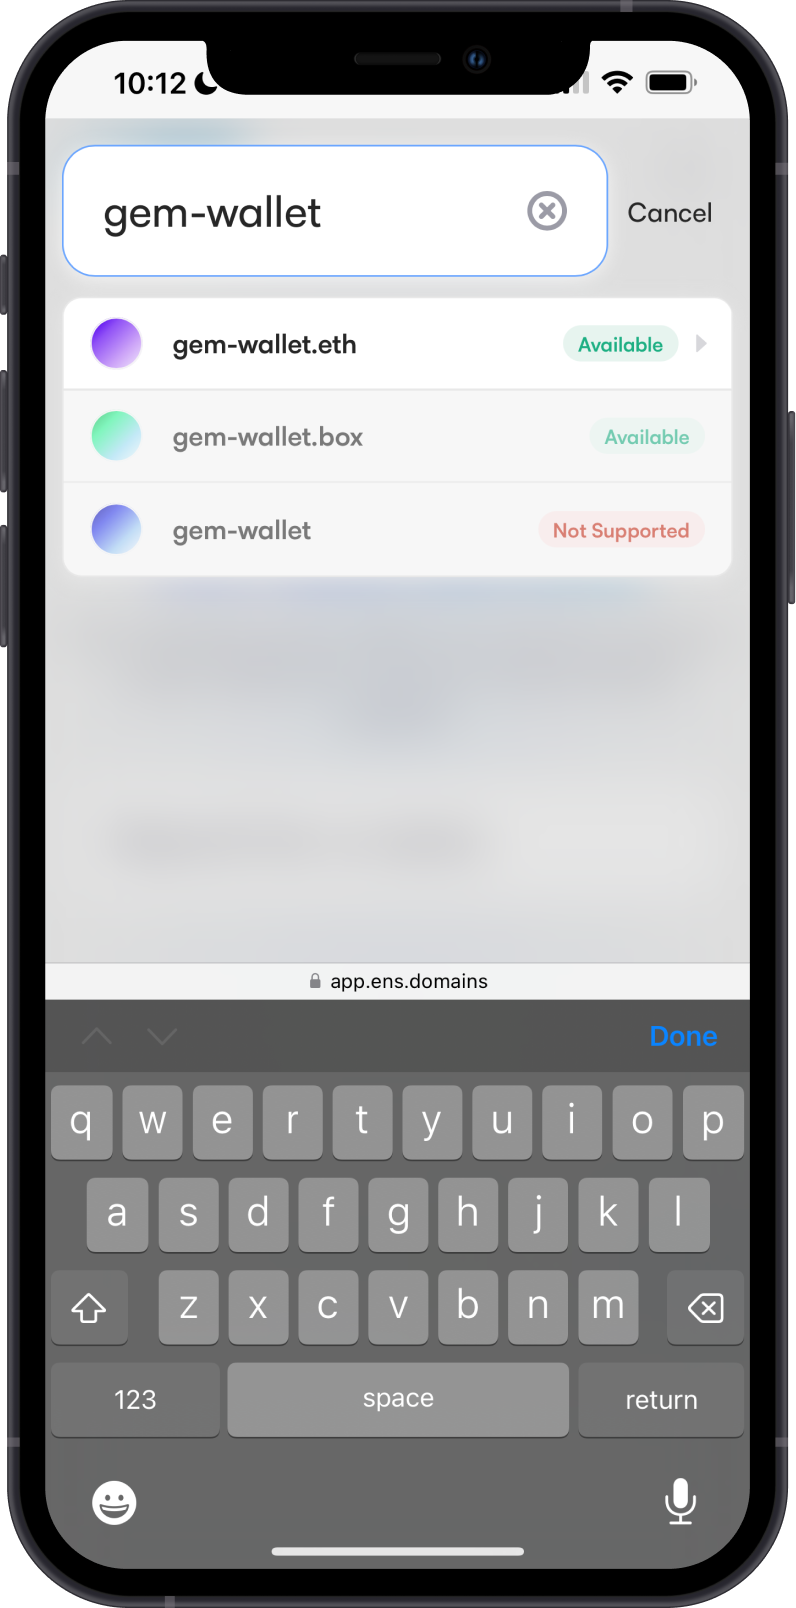
Step 2 - Search for a Name
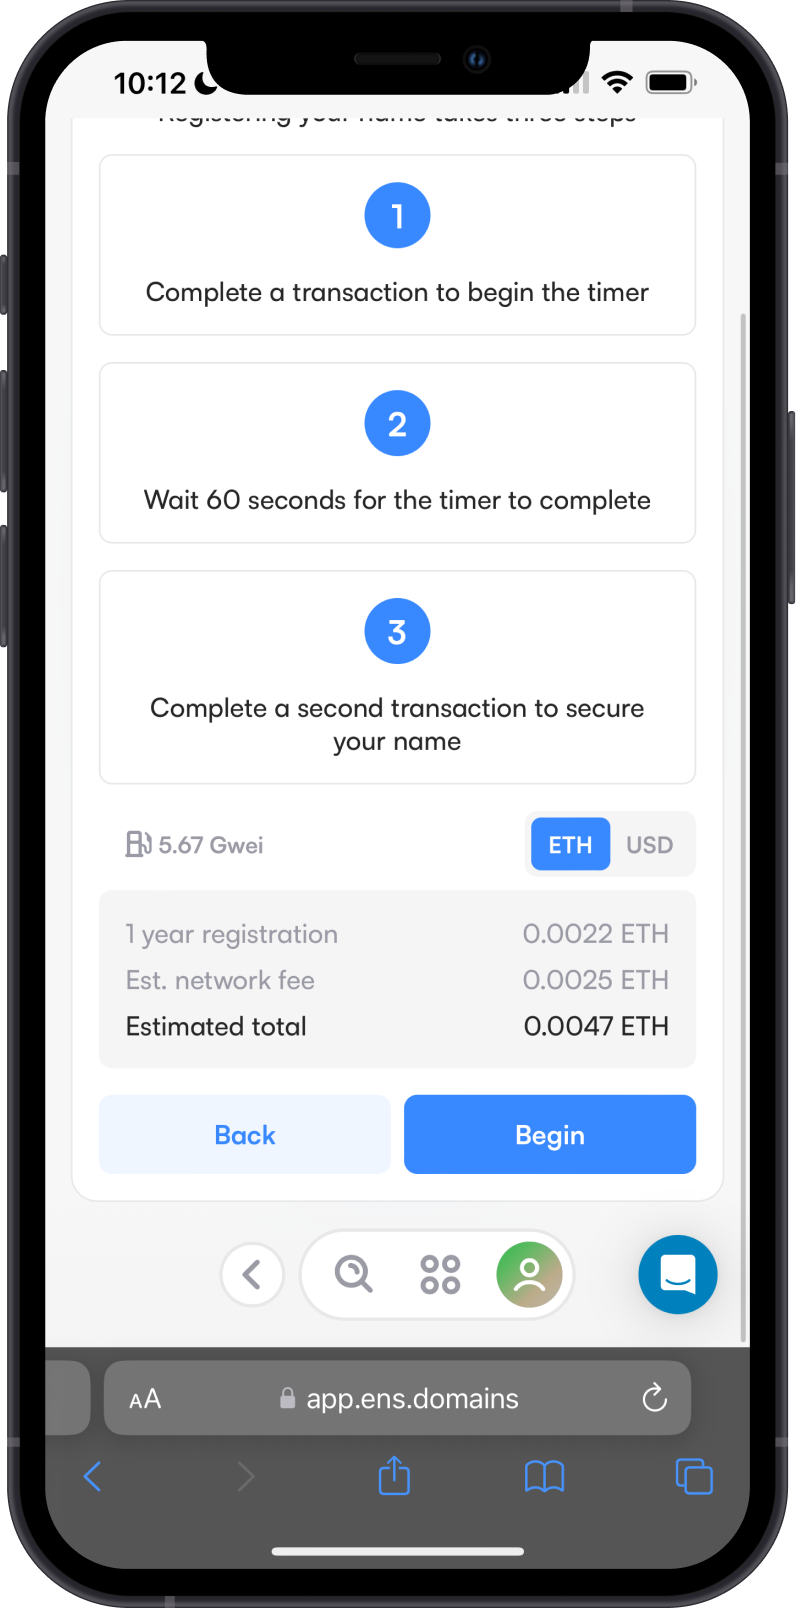
Search for an ENS Domain name that you want to get. You will given a list of available names to choose from. Tap on the one that you like and you will be shown more details about the registration cost. You can also select how many years you want to keep the domain name.
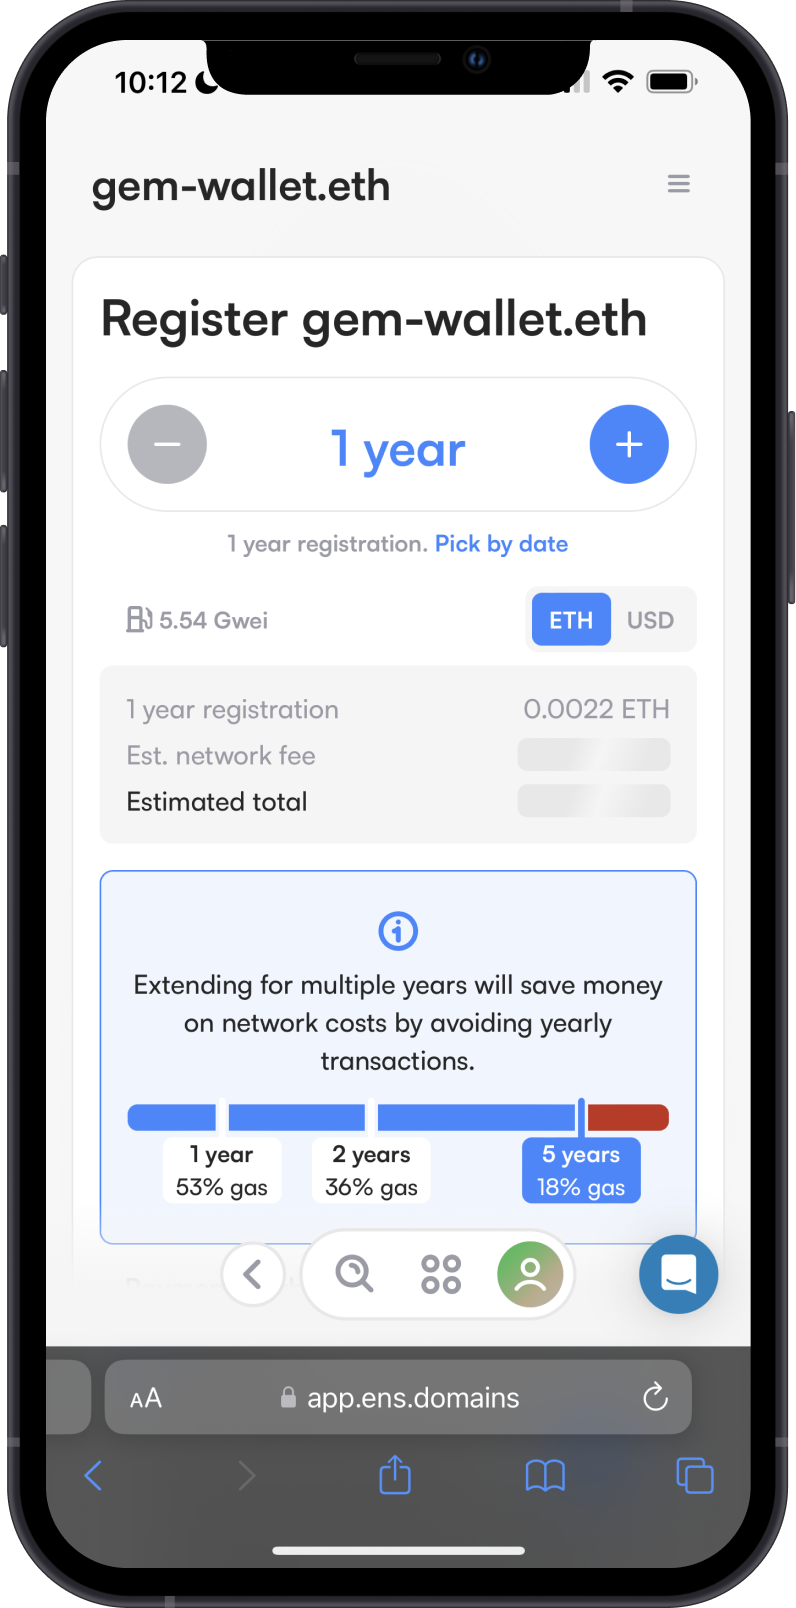
Next, you will get a prompt to setup your profile, you can skip this part and do it later. Scroll down to the bottom of the screen then tap on Begin. You will then be prompted again to Open Gem Wallet to Approve the initial registration phase. Tap on Confirm to proceed.
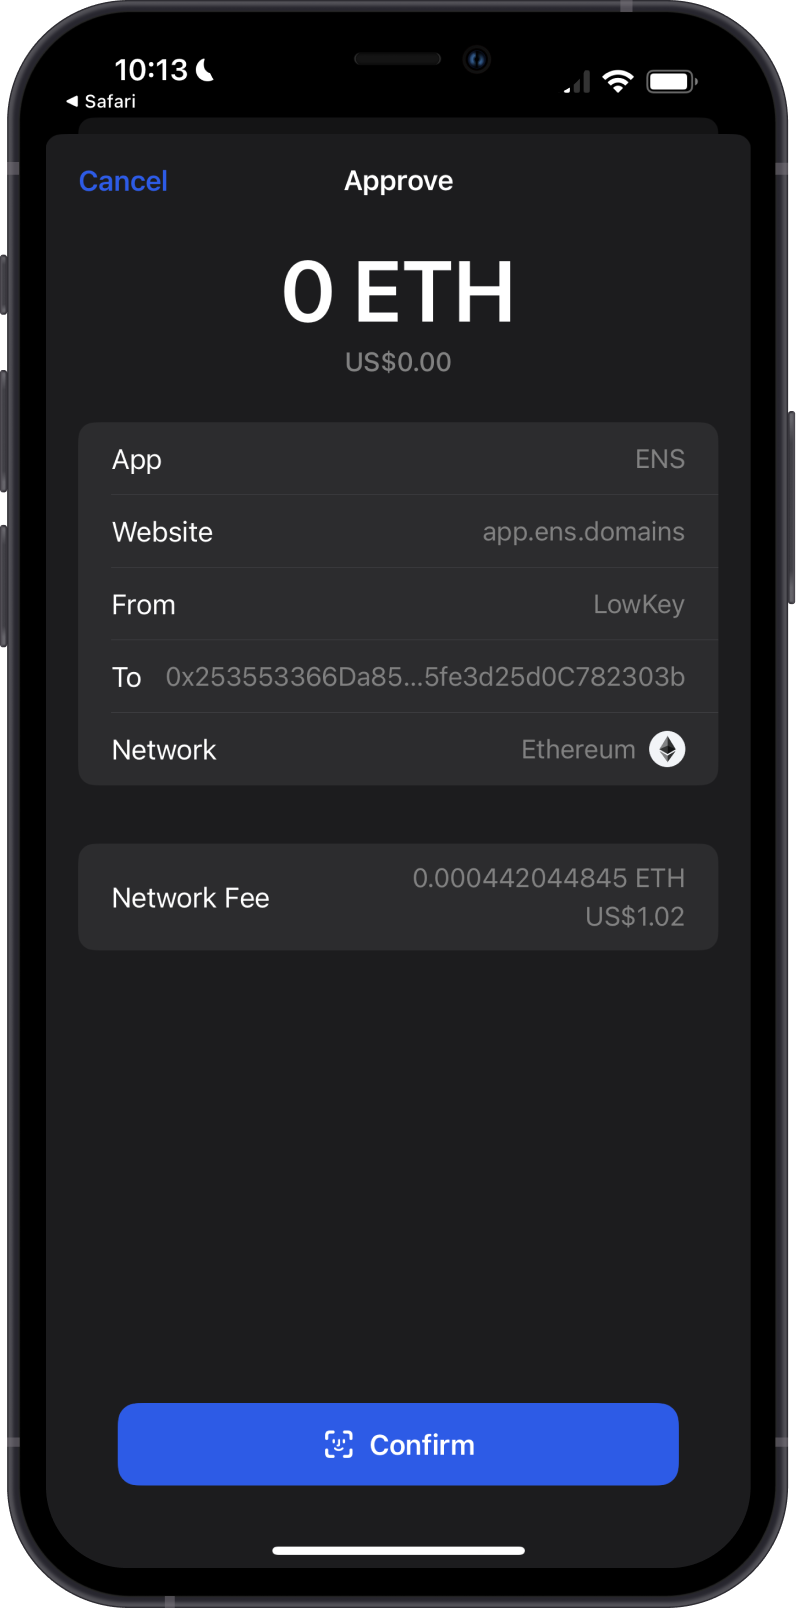
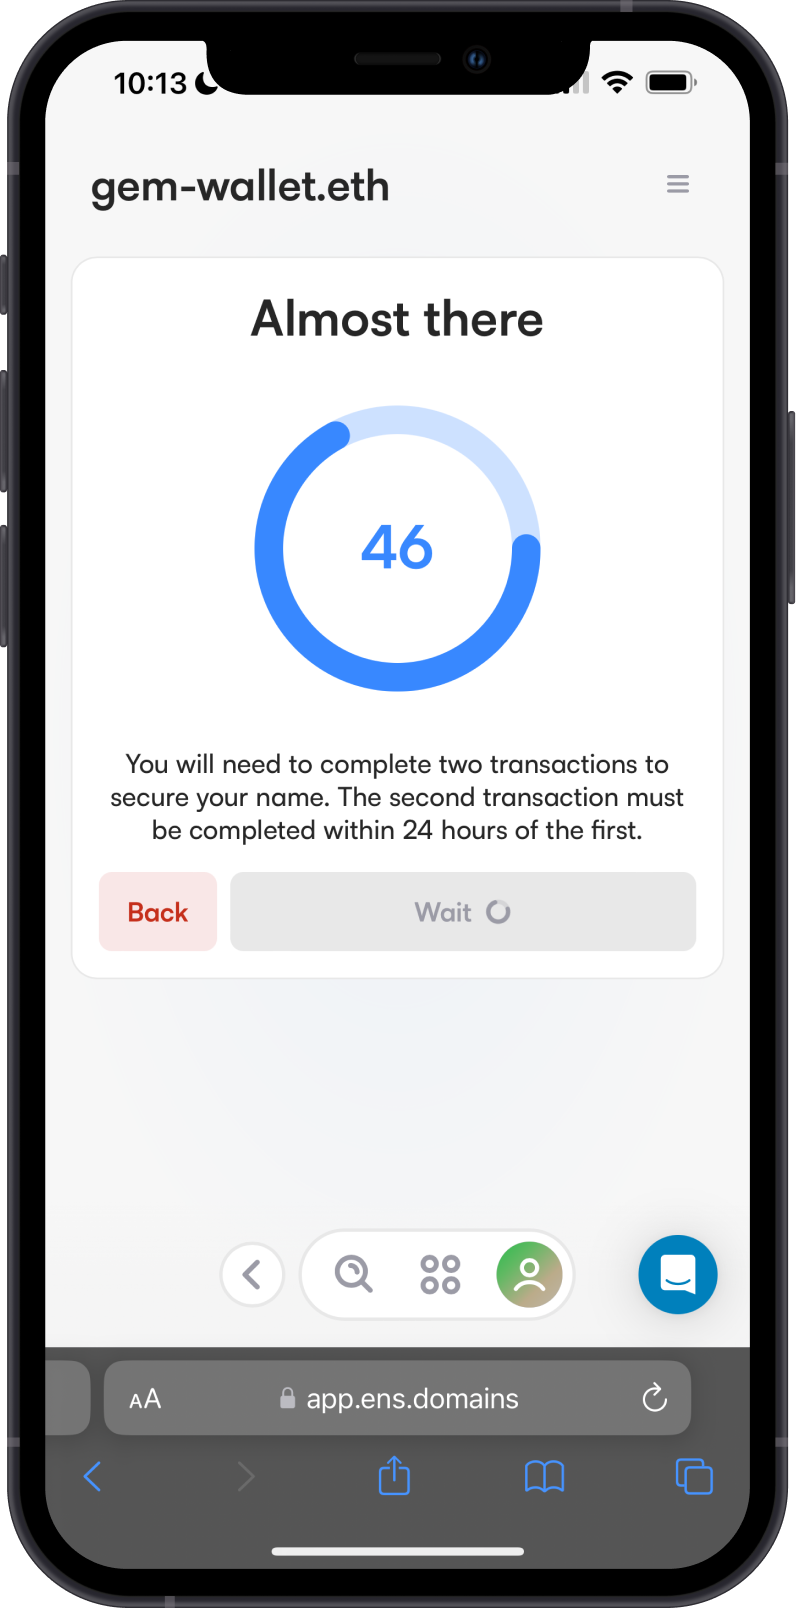
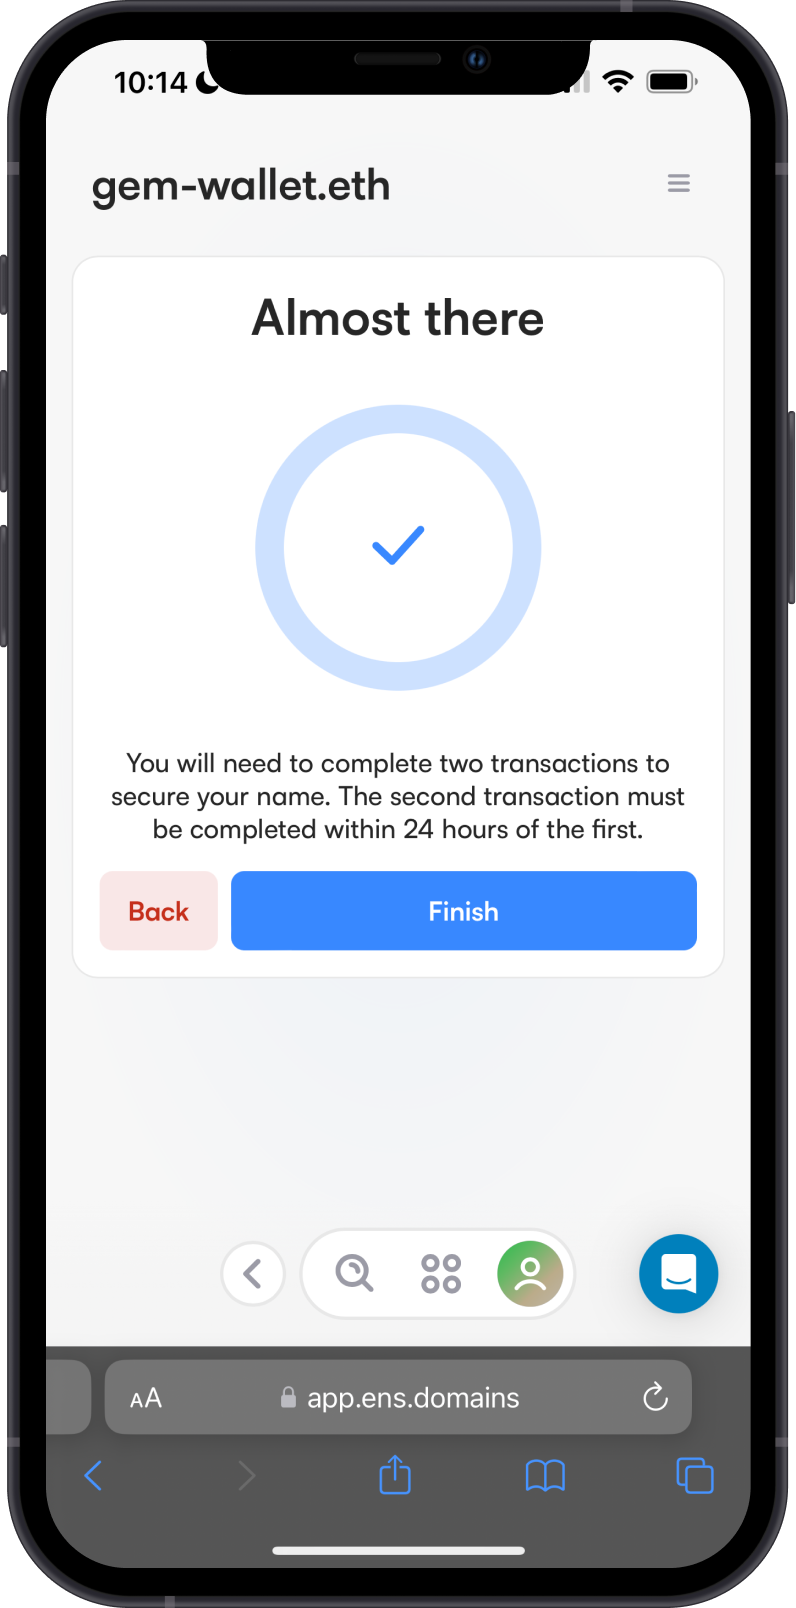
This is the first transaction that needs to be completed before you can purchase an ENS domain. Wait for it to be completed. Once it is done, tap on Finish.
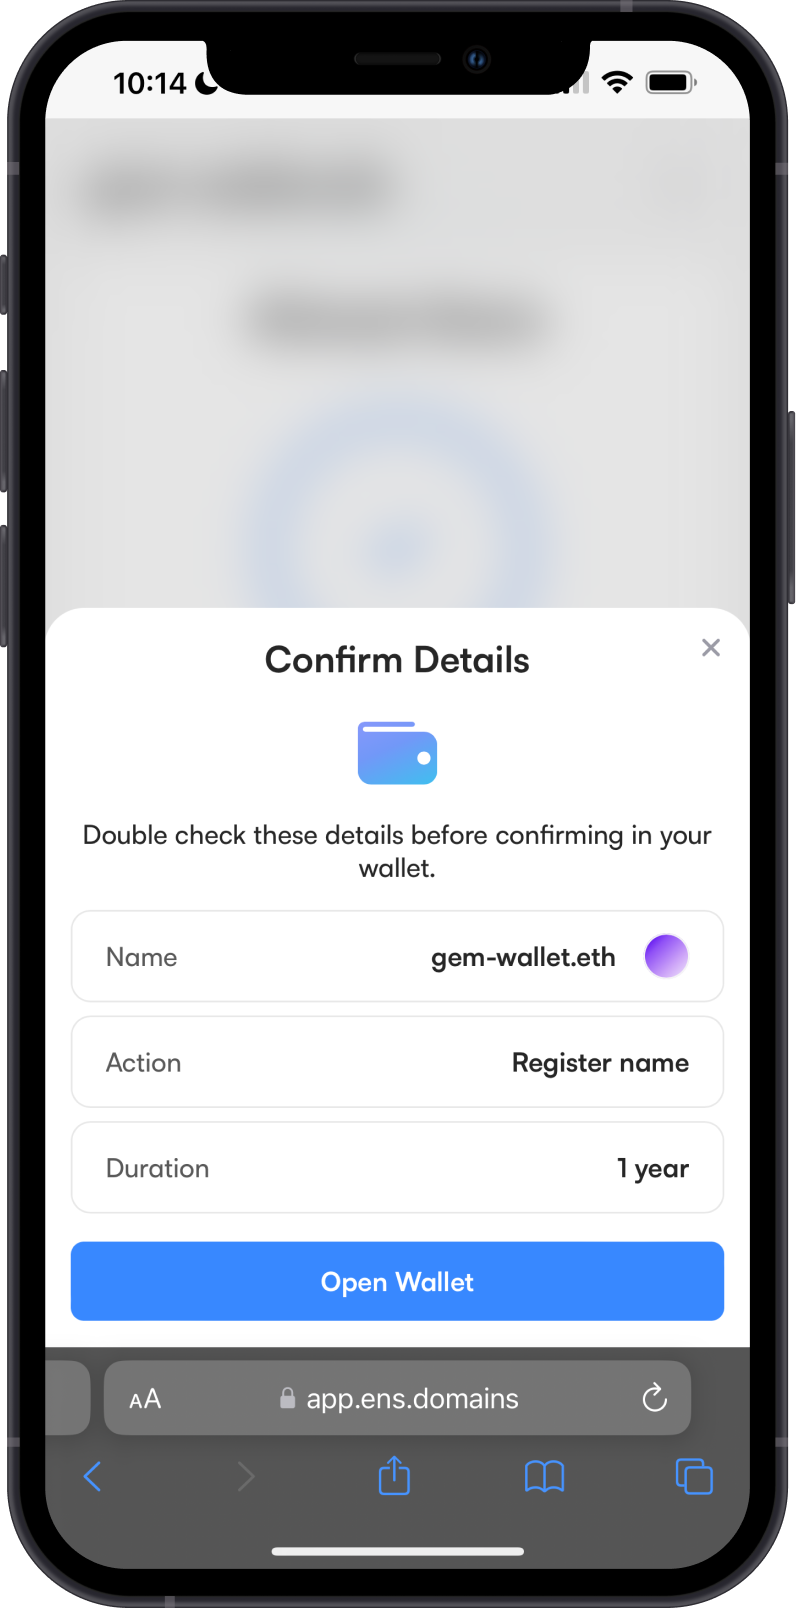
Step 3 - Purchase the Name
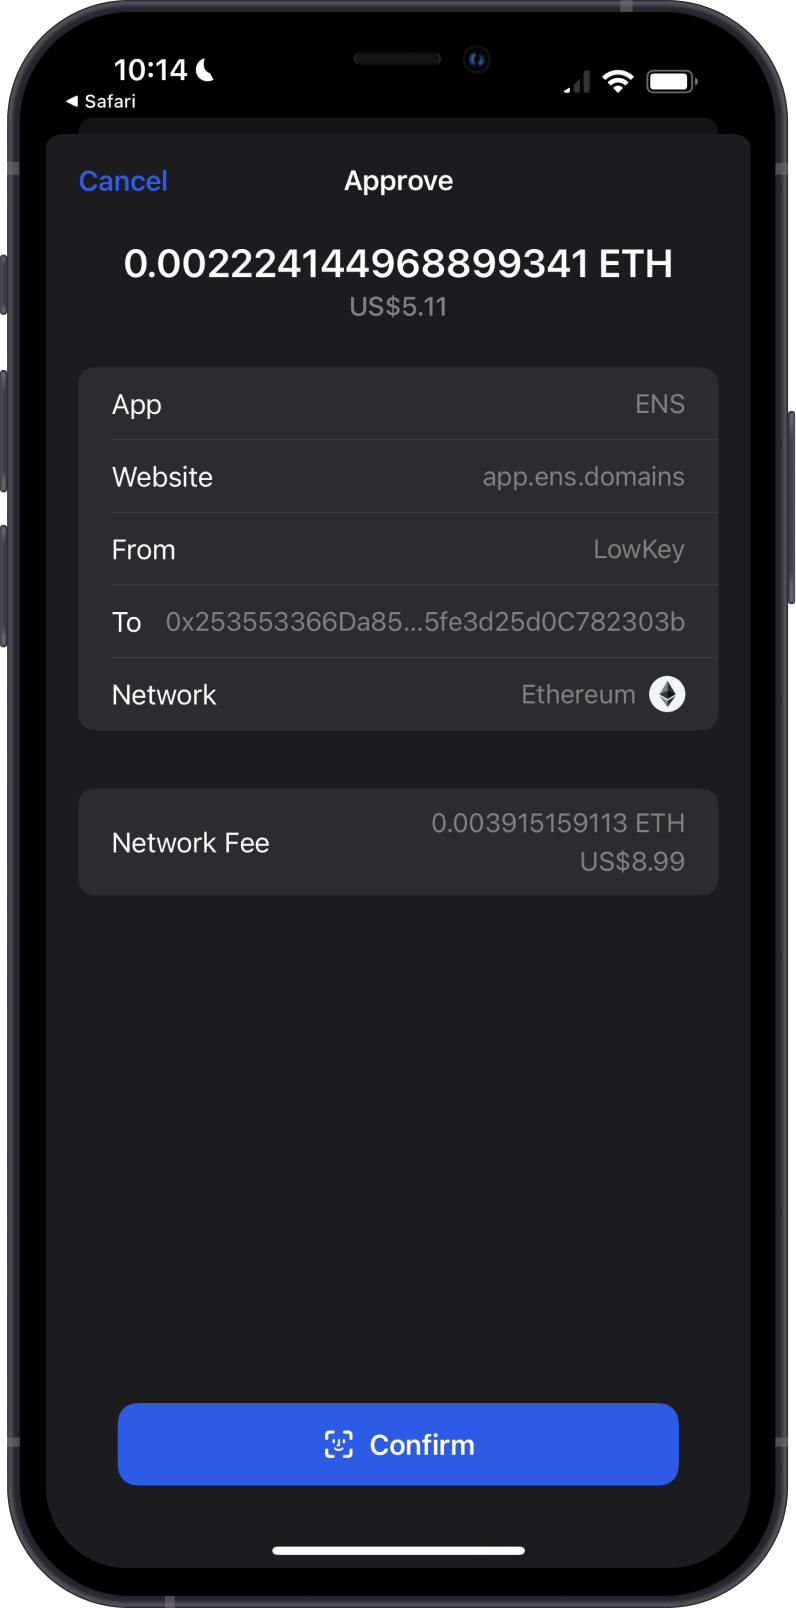
Confirm the details of your purchase then tap on Open Wallet. Approve the transaction by tapping on Confirm
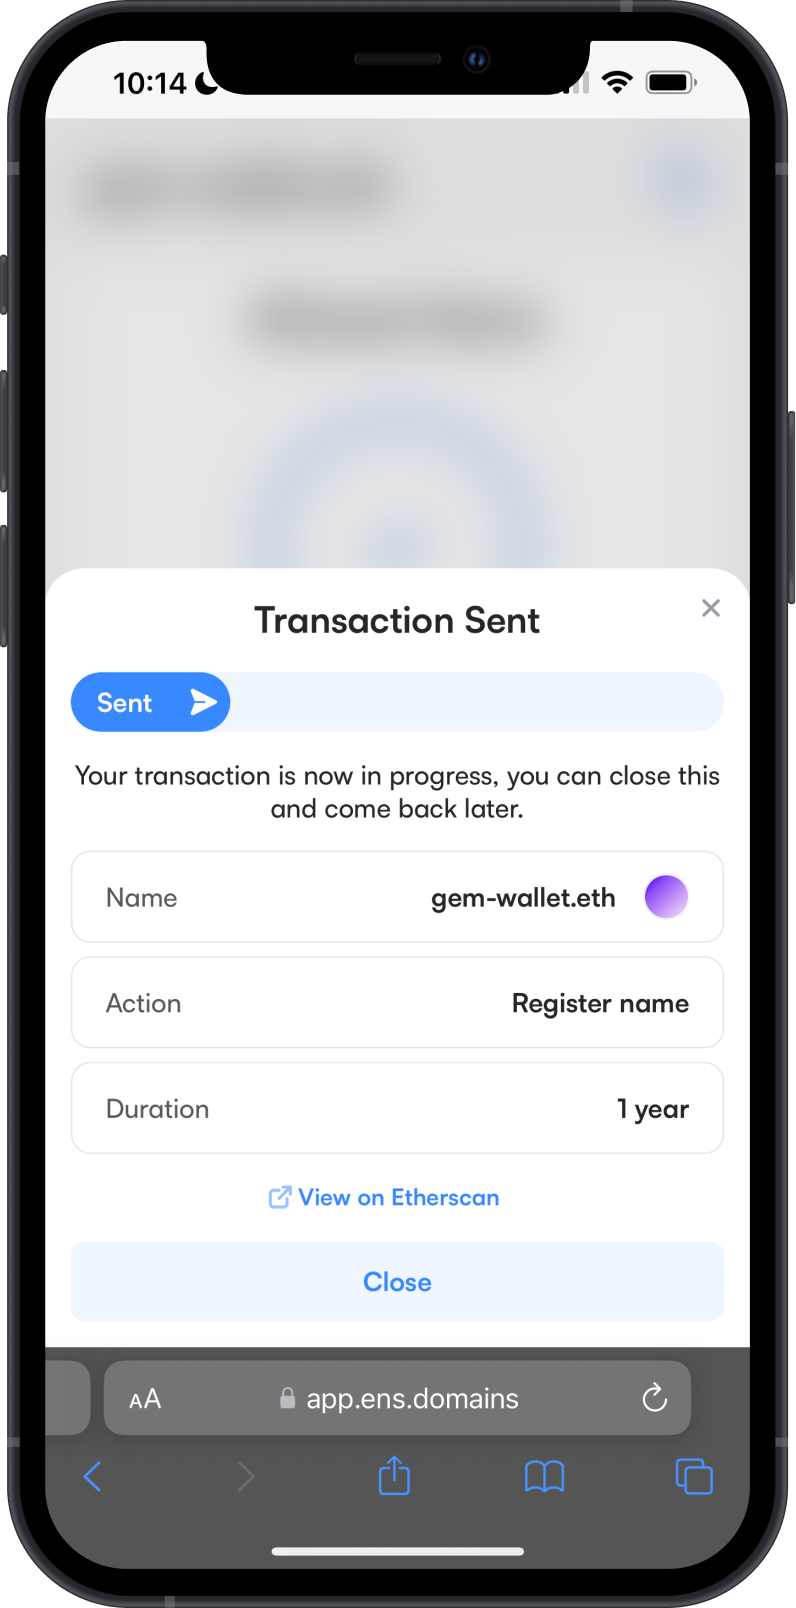
wait for the transaction to be confirmed on the Ethereum network. Congratulations, you have successfully purchased and register an ENS Domain.
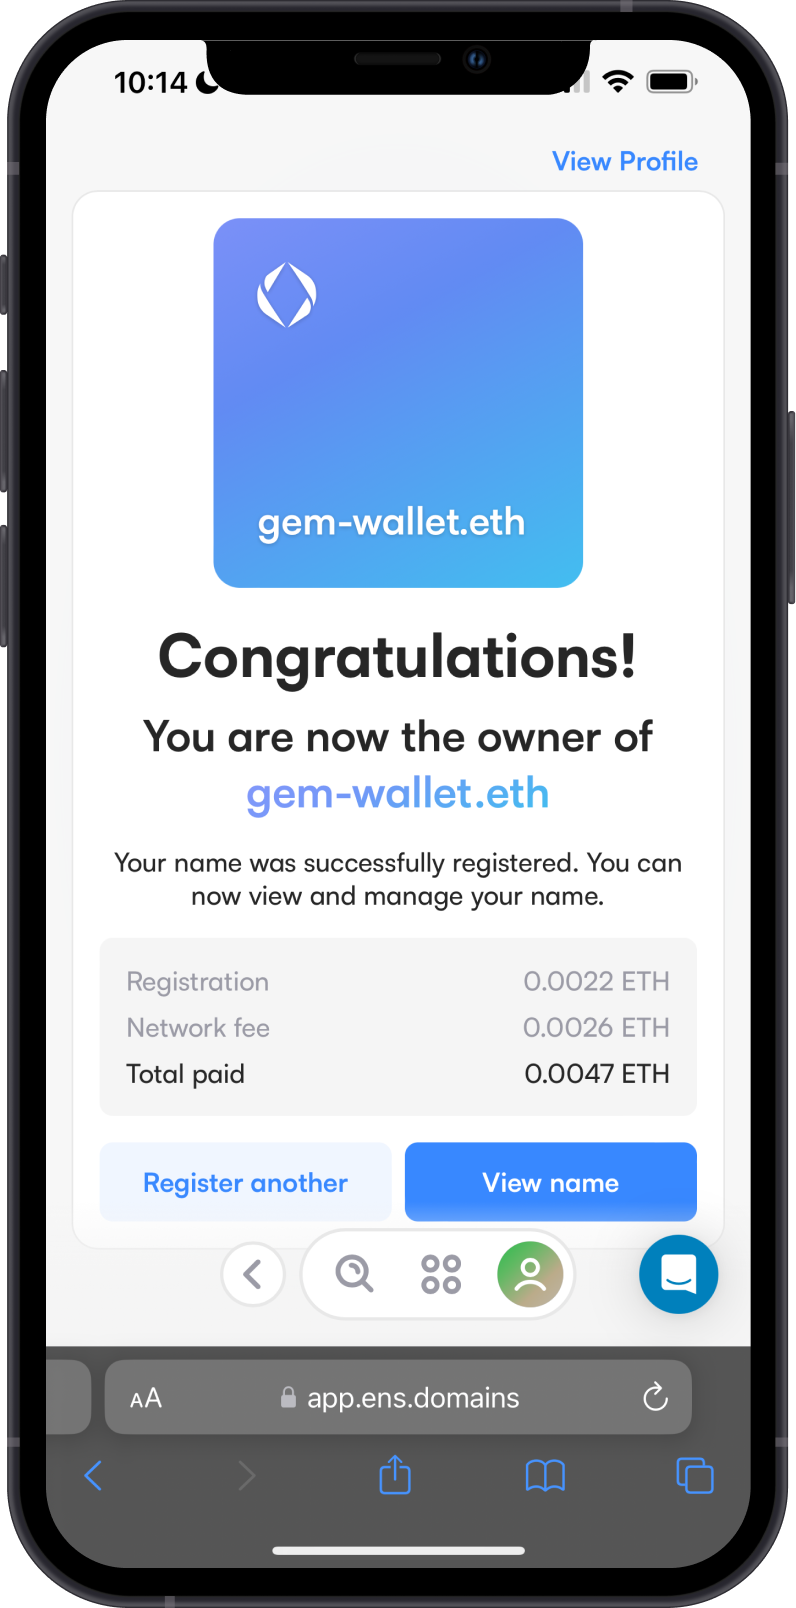
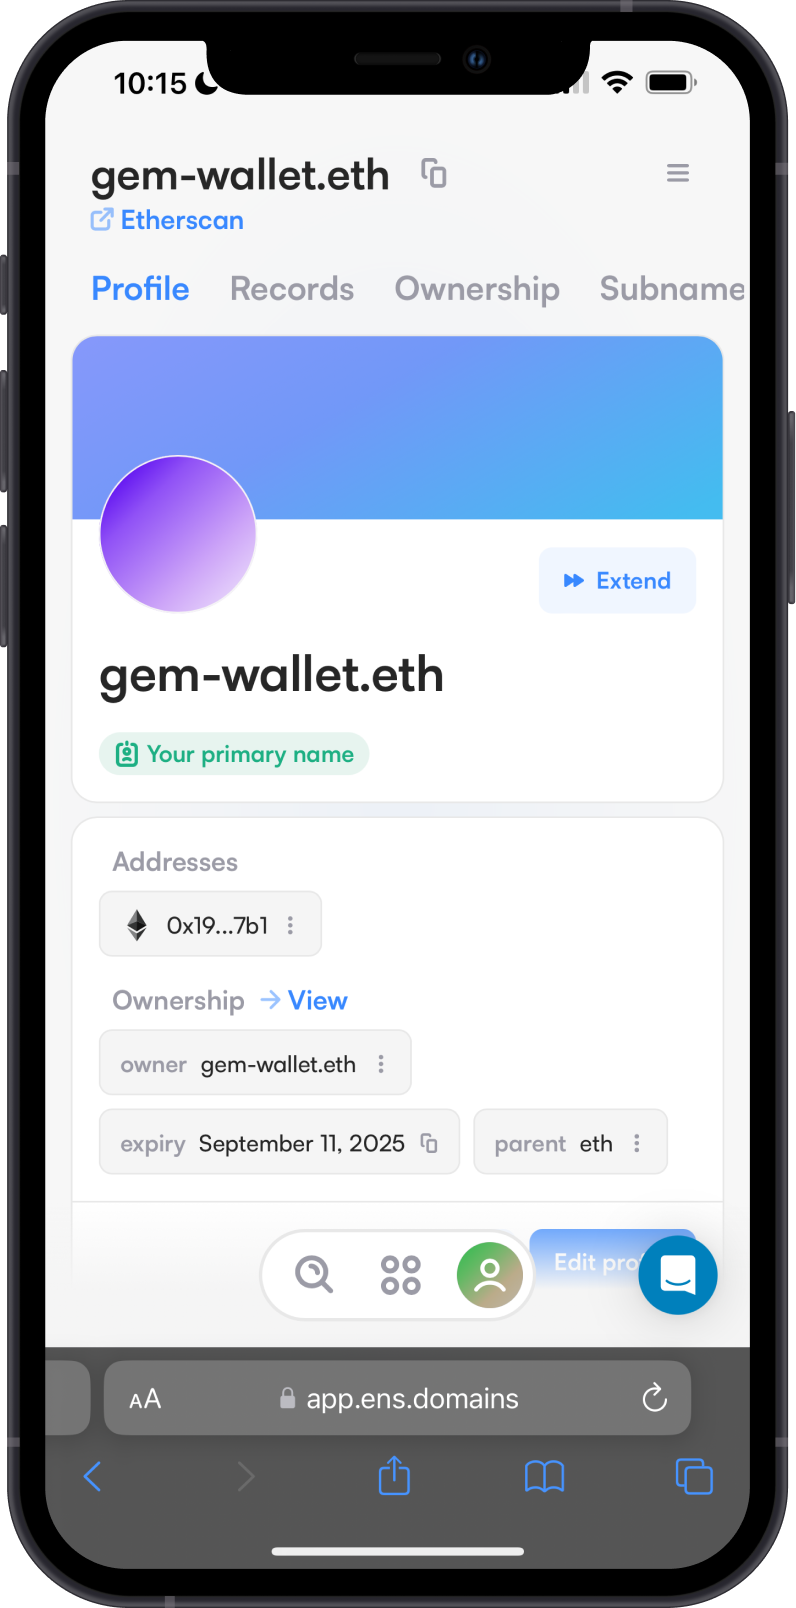
Tap on View Name to see the details of your ENS Domain. You can personalize your profile and also edit some Records to add your other cryptocurrency addresses.
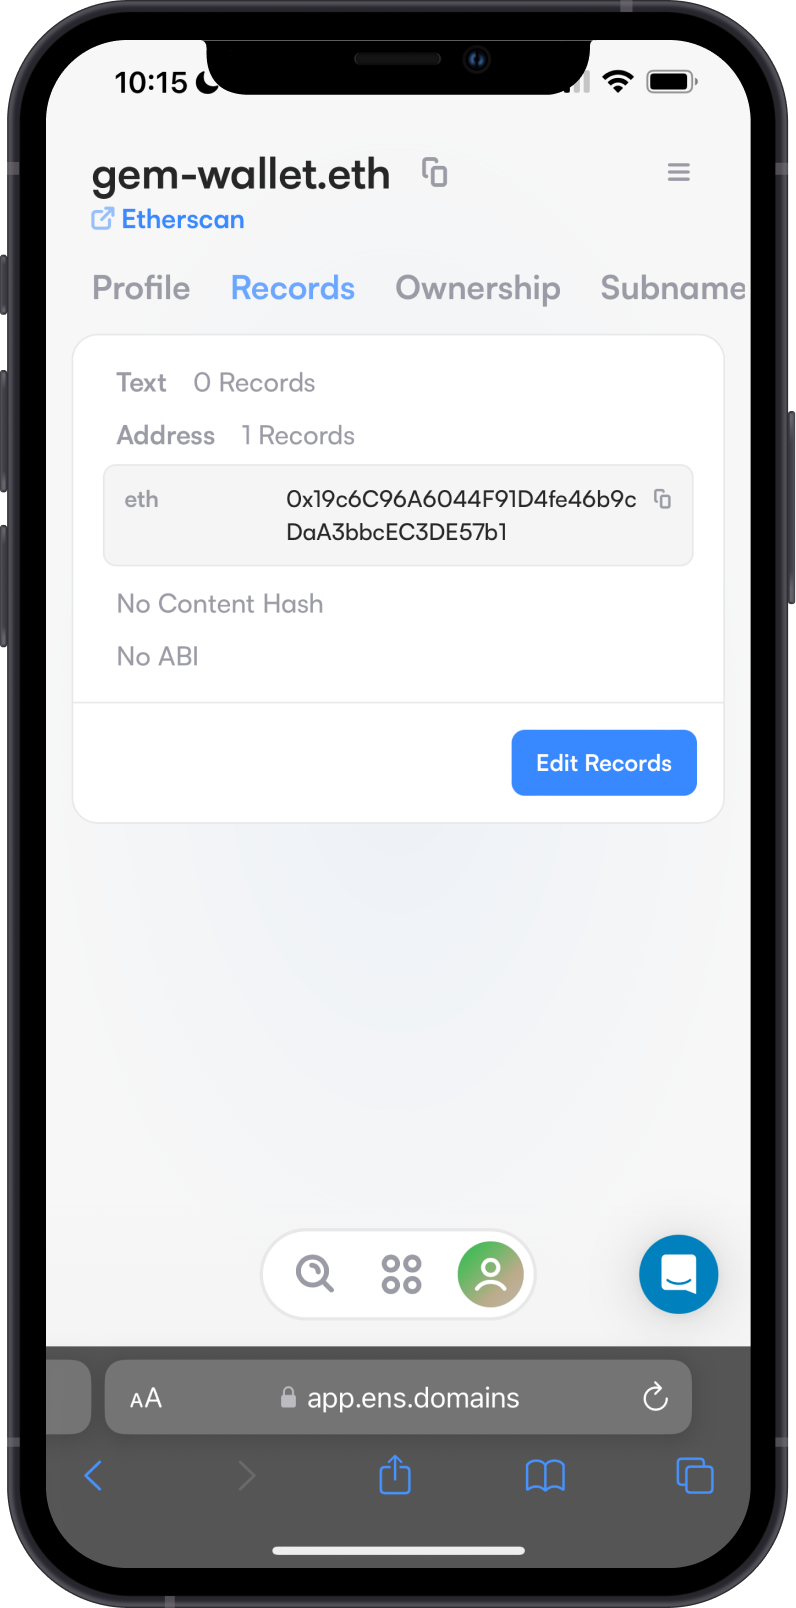
(Optional) Configure Records
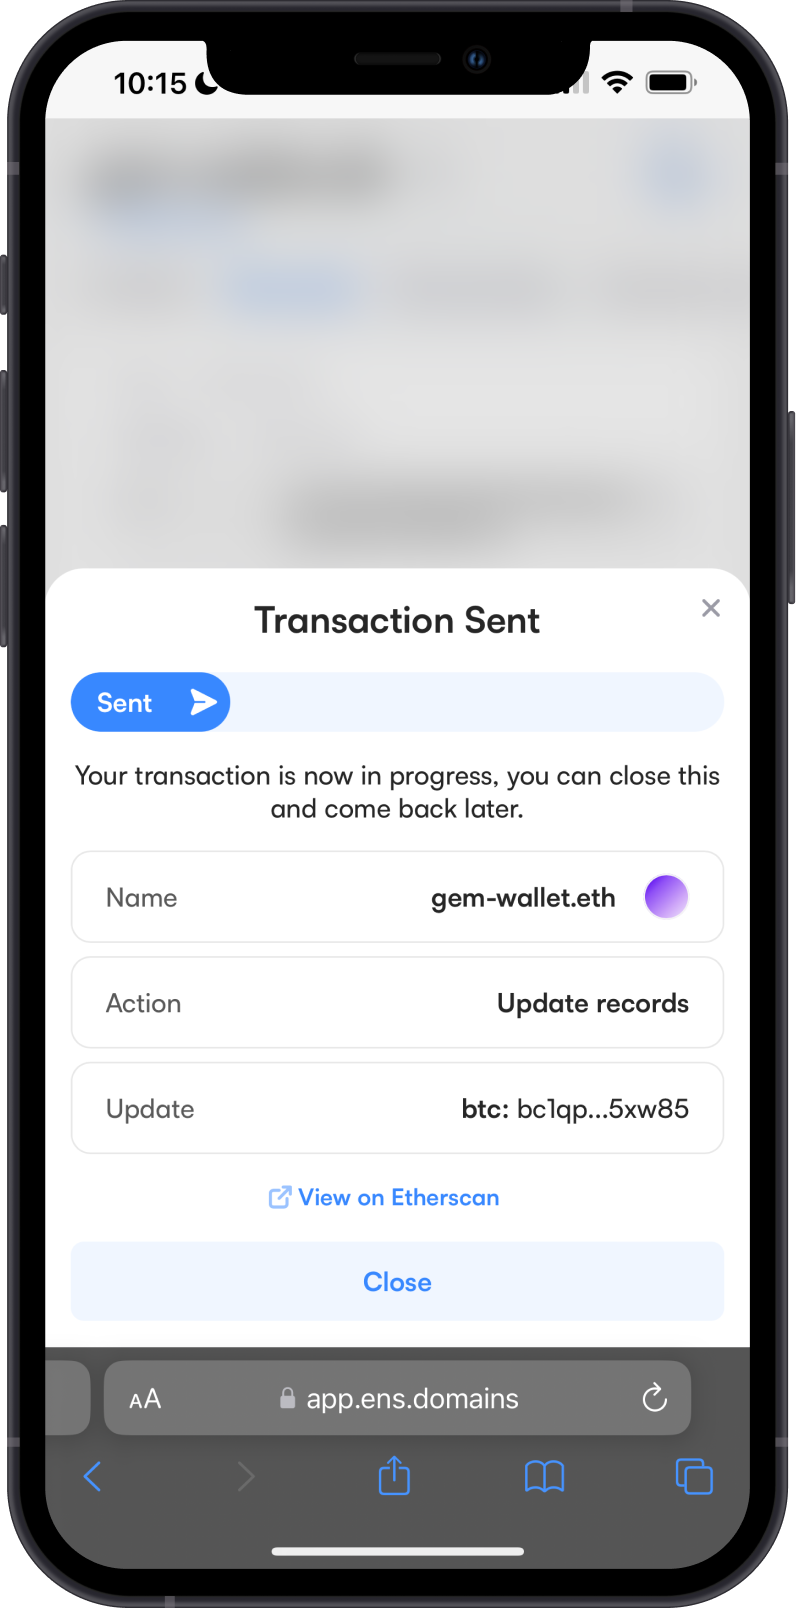
You can now add other cryptocurrency address that you can associate to the ENS Domain that you have purchase. Select the crypto you want to add then put the address. Once you are done, tap on Save.
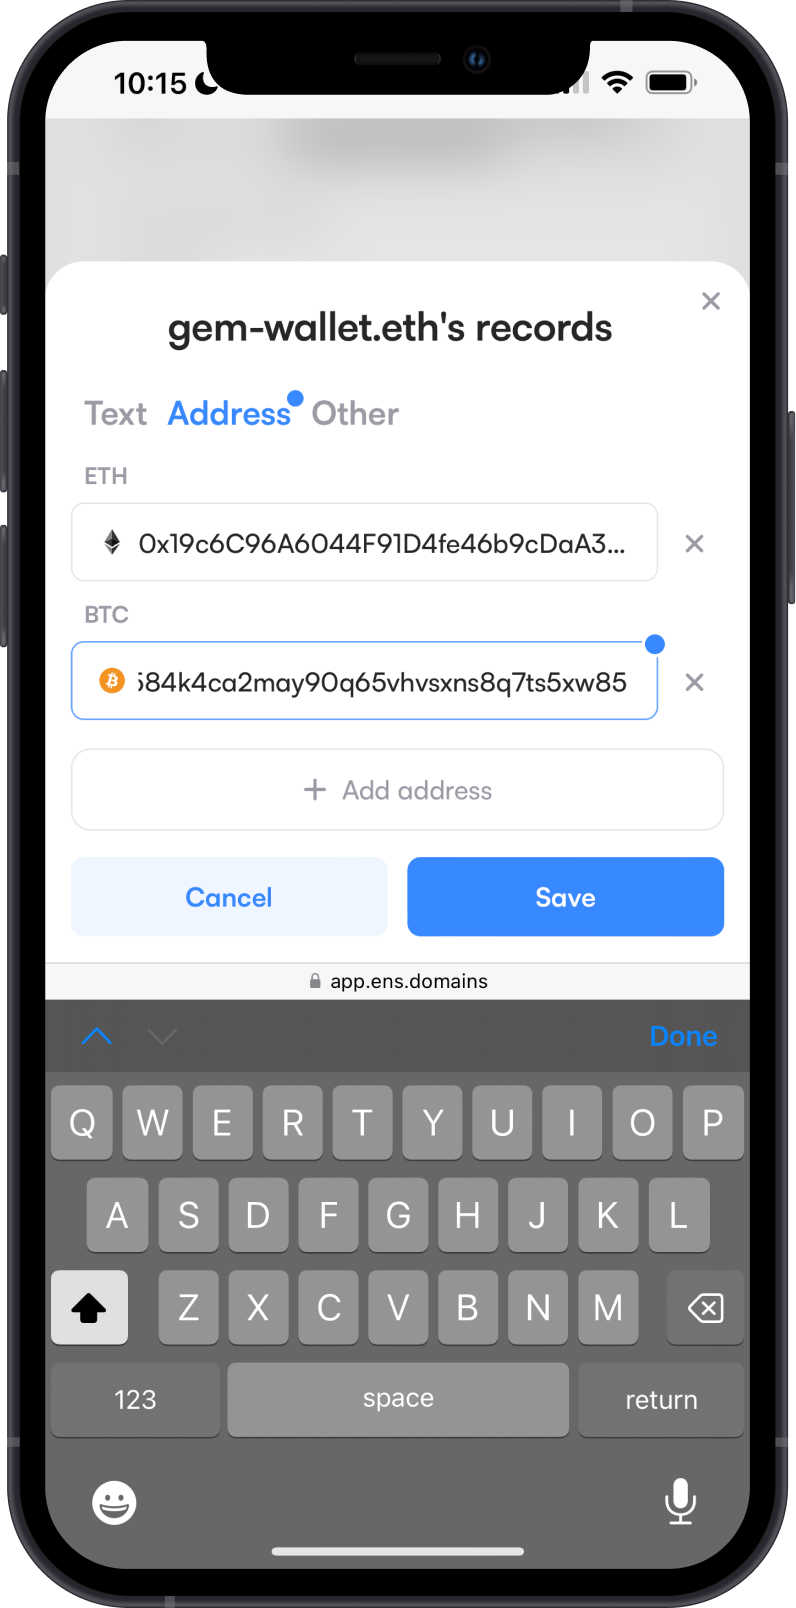
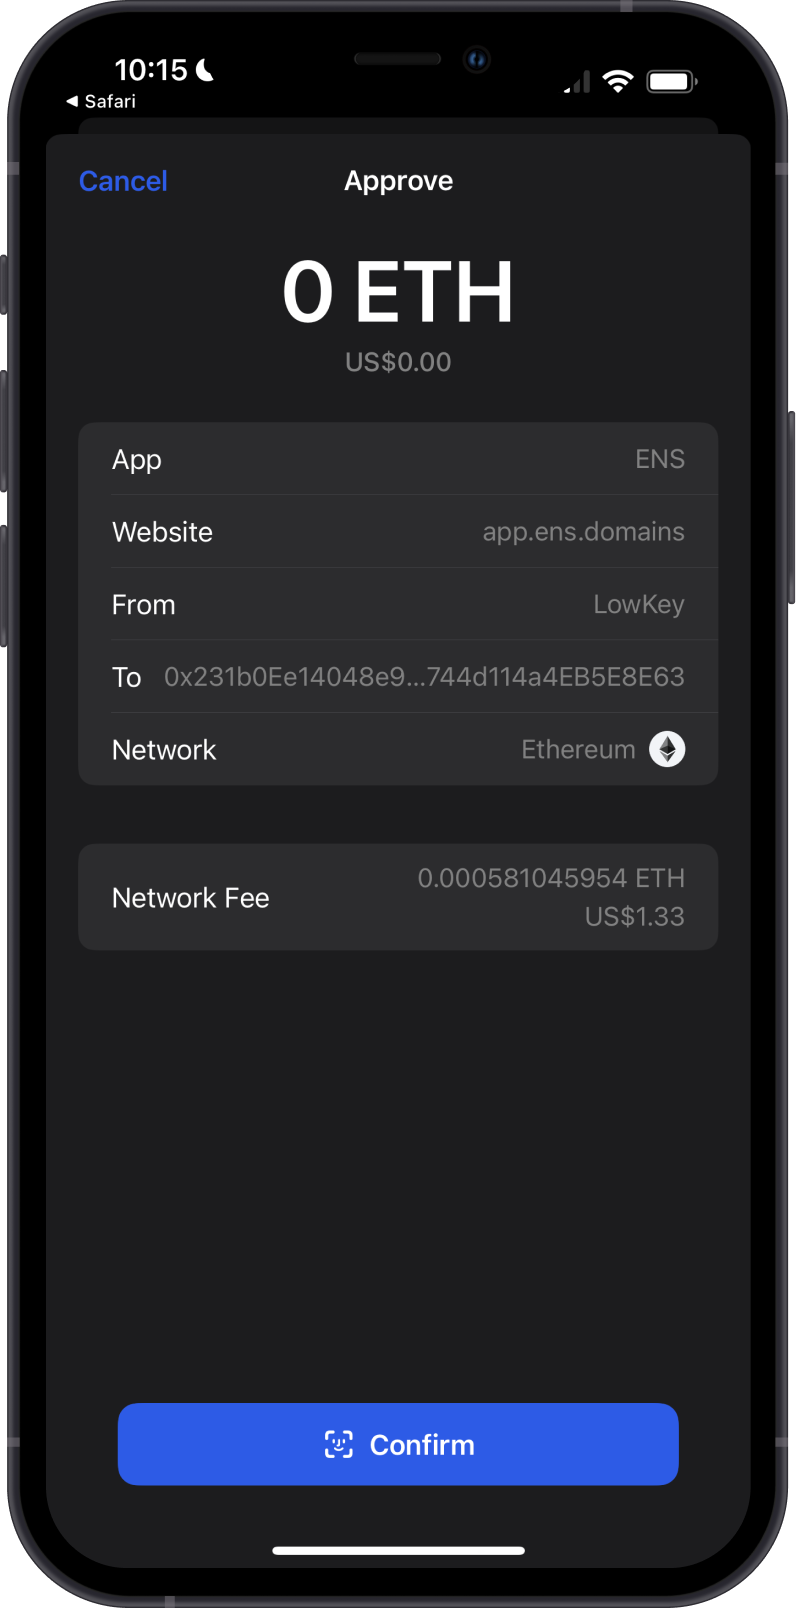
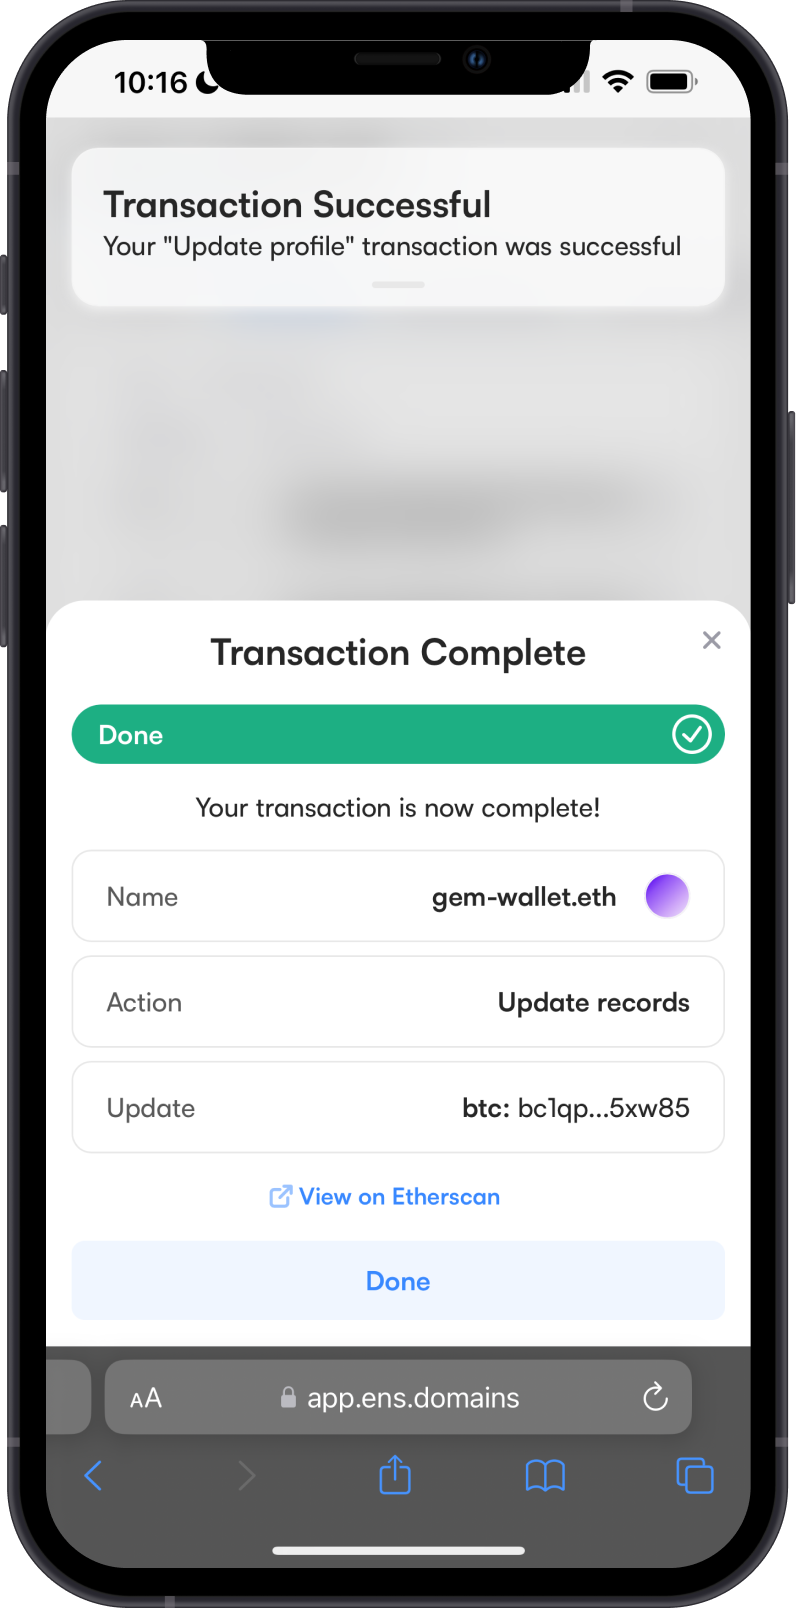
Wait for the Ethereum network to process the transaction. Once it is confirmed, your Records will be updated with the additional address.
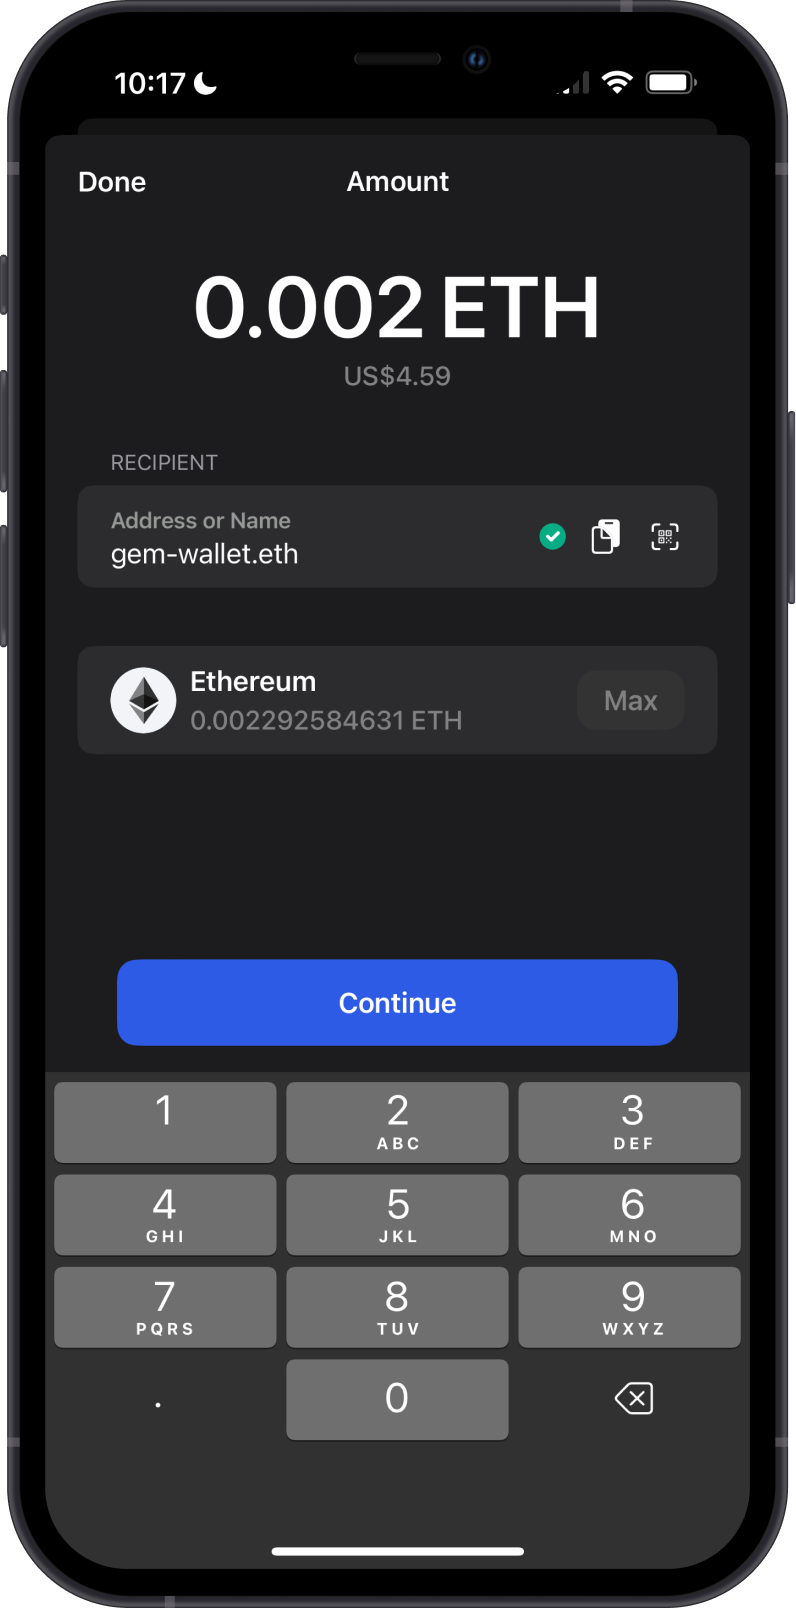
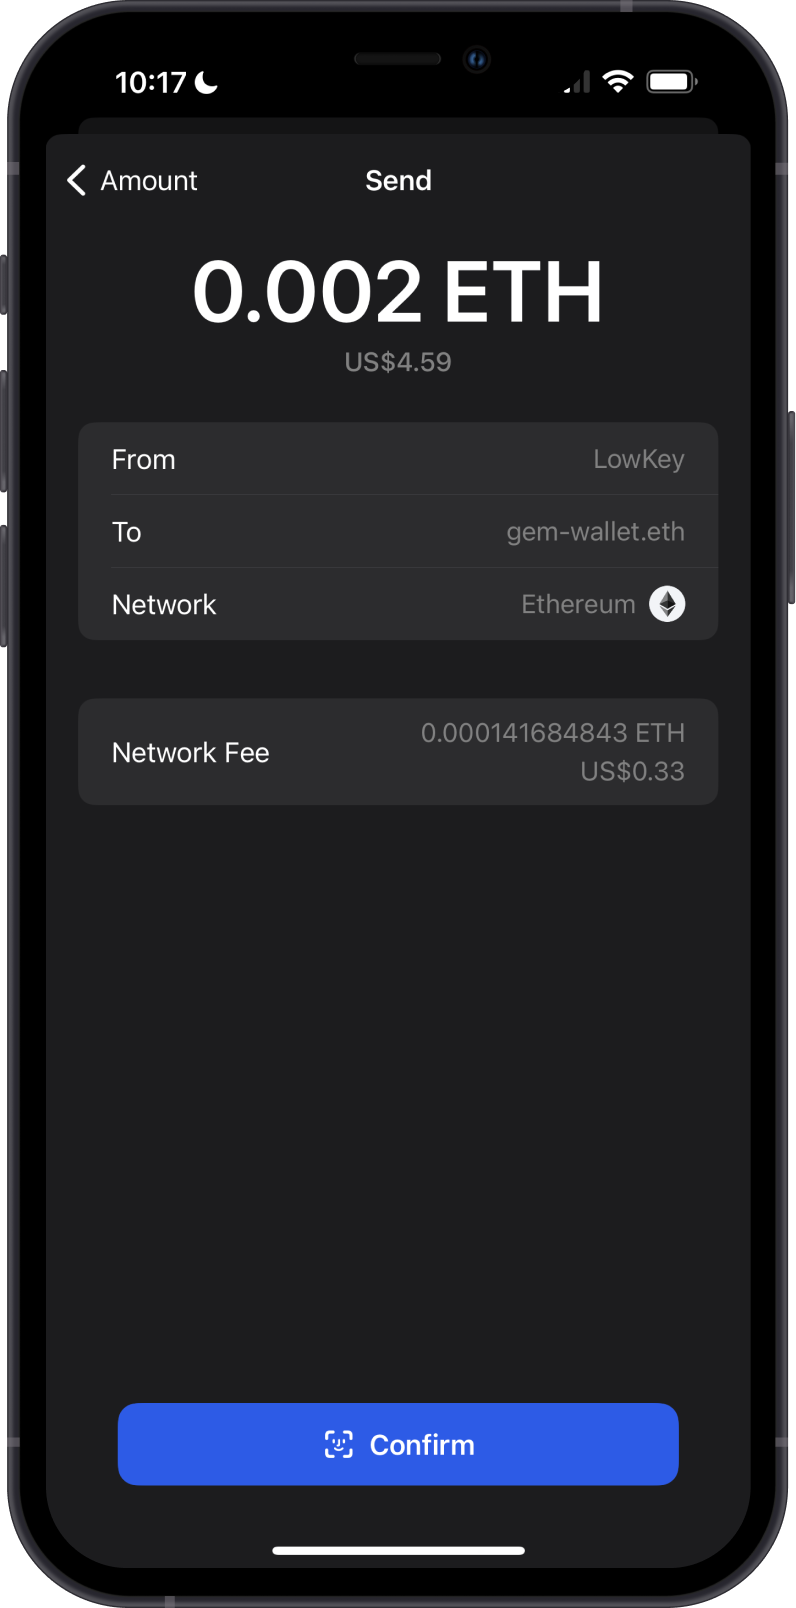
Try sending crypto to the ENS Domain address. There will be a green check mark that will show up to indicate that the domain name is recognized.
By using an ENS Domain, the long and complicated addresses are substituted with human-readable names, making it easier to send and receive cryptocurrencies and interact with blockchain services.